Introduction
Today is the fourth day of my coding journey where I learned the intermediate CSS. The topics I covered today are
The Cascade – specificity and Inheritance
CSS’s two core ideas are specificity and inheritance, which govern how styles are applied to elements. Understanding these ideas is essential for efficiently managing and troubleshooting your stylesheets.
The Cascade
CSS uses the term “cascade” to describe how styles are applied based on various criteria and priorities. When numerous styles are applied to an element, the browser uses a cascade mechanism to determine which style is important. This algorithm is made up of three basic components:
- Position: The position of CSS style determines the use of style to the element. Lower the position of CSS style more it has high priorities.
Li{
Colour: red;
Colour: blue;
}
In this example the color style changes to blue due to its lower position.
2. Specificity
<li id=”first-id” class=”first-class” draggable>
Li{color:blue;} àElement
.first-class {color:red;} àclass
Li[draggble] {color:purple;} àattribute
#first-id{color: orange;} àid
The specificity ranks from id, attribute, class and element.
3. Type
External CSS
Internal CSS
Inline CSS
The importance of the CSS file will be in 3, 2, 1 order.
4. Importance
It is a keyword used by adding ‘important’ in any CSS rule.
H1{ color:red;}
H1 {colour: green! important;} Css will apply green colour as it is used for important keyword
Combining CSS selectors
In CSS, combining selectors refers to utilizing multiple selects to target specific items more specifically. This gives you more control over the styles used on various portions of your web pages. Here’s a full description of the different ways selectors can be combined in CSS.
- Descendant selector (>): A descendant selector selects elements that are nested within a specified ancestor element, at any level of nesting.
Syntax
Ancestor descendant {
/*Style*/
}
For example
/* HTML */
<div class=”container”>
<p>This is a paragraph.</p>
<div class=”nested”>
<p>This is a nested paragraph.</p>
</div>
</div>
/* CSS */
.container p {
color: blue;
}
2. child selector
A child selection looks for elements that are direct children of a specified parent element.
Syntax
parent > child {
/* styles */
}
/* HTML */
<ul class=”list”>
<li>Item 1</li>
<li>Item 2</li>
<ul>
<li>Sub-item 1</li>
</ul>
</ul>
/* CSS */
.list > li {
color: red;
}
In this example, only the li elements that are direct children of .list will be styled with a red colour. The nested li within the ul will not be affected.
3. Adjacent Sibling Selector (+)
An adjacent sibling selection looks for an element that is immediately precedes a given sibling element.
Syntax
previous + next {
/* styles */
}
Example
/* HTML */
<h1>Title</h1>
<p>Paragraph following the title.</p>
<p>Another paragraph.</p>
/* CSS */
h1 + p {
font-weight: bold;
}
4. General Sibling Selector (~)
A general sibling selector targets all elements that are siblings of a specified element, following it in the document.
Syntax
previous ~ next {
/* styles */
}
/* HTML */
<h2>Subtitle</h2>
<p>First paragraph.</p>
<p>Second paragraph.</p>
/* CSS */
h2 ~ p {
color: green;
}
In this example, all p elements that are siblings of h2 will be styled with a green colour.
CSS position
It is crucial to understand the importance of CSS positioning to control the layout of the element of the webpage.
1 Static Positioning
2. Relative Positioning
3. Absolute Positioning
4. Fixed Positioning

Static Positioning ( position; ‘static’;)
Default Value: All elements have this positioning by default.
Behavior: Elements are positioned according to the normal flow of the document and they are not affected by top, bottom, left, or right properties.
Use Case: When you don’t need to explicitly position an element.
.static {
  positon: static;
  height: 250px;
  width: 250px;
  background-color:black;
}
Click here for a visual representation
Relative Positioning ( position: ‘relative’;)
This position sets the item relative to the default position in the document flow. this implies that it still occupies its original space in the flow of the document without affecting other elements by position change. This type of position is adjusted by using left, right, top and bottom properties with the desired value.
div {

  position: relative;
  top: 20px;
  left: 30px;
}
Click here for the visual representation
Absolute Positioning (position: ‘absolute’;)
- relative to the nearest positioned ancestor: If there is no positioned ancestor (anything with a position other than static), it will be positioned relative to the initial containing block (the
<html>element). - Removed from normal flow: It does not affect the position of other elements and other elements are not affected by it.
- Usage: Useful for placing elements precisely within a container.
.container {

    position: relative; /* Often used as a reference */

}

.element {

    position: absolute;

    top: 10px;

    left: 20px;

}
Click here for the visual representation
Fixed Positioning
The fixed position was removed from the normal flow and positioned relative to the top left corner of the browser by default even when the page is scrolled down. it is commonly used for setting up the navigation bar, footer or other elements that should be visible at all times
.element {
    position: fixed;
    top: 0;
    right: 0;
}
Click here for the visual representation
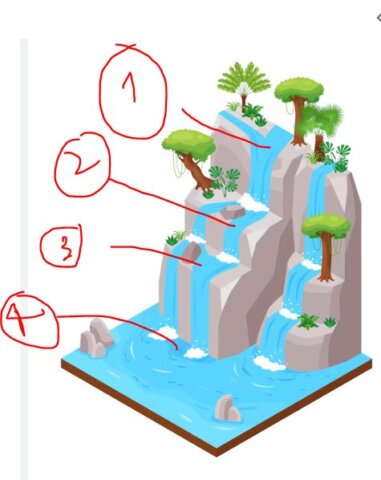
This image is done as a project using combining CSS and CSS position

Conclusion
Overall, this is all I learned today about intermediate CSS. it was quite confusing in the beginning but I was about to understand it after using different resources. I tried to display what I learned I hope it will help you as well. Stay in touch, feel free to comment.
Resources
- https://www.w3schools.com/css/css_positioning.asp
- https://developer.mozilla.org/en-US/docs/Web/CSS/position
- https://www.udemy.com/course/the-complete-web-development-bootcamp/learn/lecture/37350652#content
.